You have the option of installing Drupal and WordPress locally to test them out and run them it without having to rely on being connected to the Internet.
Both content management systems rely on the xml <----> mysql client-server relationship (as delivered by php). To simulate this function, you need to install and run a server simulator package on your computer. This is really not that hard to do, but there are some steps involved. Be sure to do each step in order, as shown in this video tutorial (Runs approx 9 minutes):
Step One: Install MAMP on your computer
Click Here to Watch the Tutorial
Step Two: Download WordPress/Drupal zip file
There are many ways to download and install these programs. As stated in the lessons, the ISP often provide quick installs on their sites. However, these procedures do not work for your computer. Instead you must download the zip files provided and then ‘unzip’/expand them locally. At that point you simply follow the easy install or five minute install processes as explained in the lessons.
Step Three: Pick a them install plug-ins/add-ons, etc.
Remember you cannot simply click to install these.. in most cases, you have to download the zip files and open them up and place them inside the folders on your local install as per instructions. Use your browser to view your creations and content (remembering to view them on more than one browser for compatibility). Sidebar: see notes below about link/path references
Step Four: Replicate your site on your remote server
This is not too tricky, but you must remember to replicate on your ISP the file hierarchies EXACTLY as they reside on your local computer. The file structure should be duplicated. This is why we had you do the ftp activity in a previous cycle… to get you used to file management and naming.Now is the time you can follow the Quick Install/5-Minute install or One click install process. Make sure you have installed on your remote site the exact same theme(s) and plug-ins/add-ons and they are in the correct location on the remote host.
Step Five: Copy over content
This is not really as difficult as it sounds.
- As seen below in the screen shot (click to enlarge), there is an import/export function under the Tool Menu (which actually creates an xml file). You first export your content to using the export function… save it to a location on your computer where you can easily find it.
- On your remote site you will use the same function to import. This requires another plug-in (called wp-import)that you need to install remotely first. Then simply click the import function. The xml file will be loaded on to your remote site. If you followed the procedure (below about link referencing, all should end up looking exactly like your local site.
[two_third]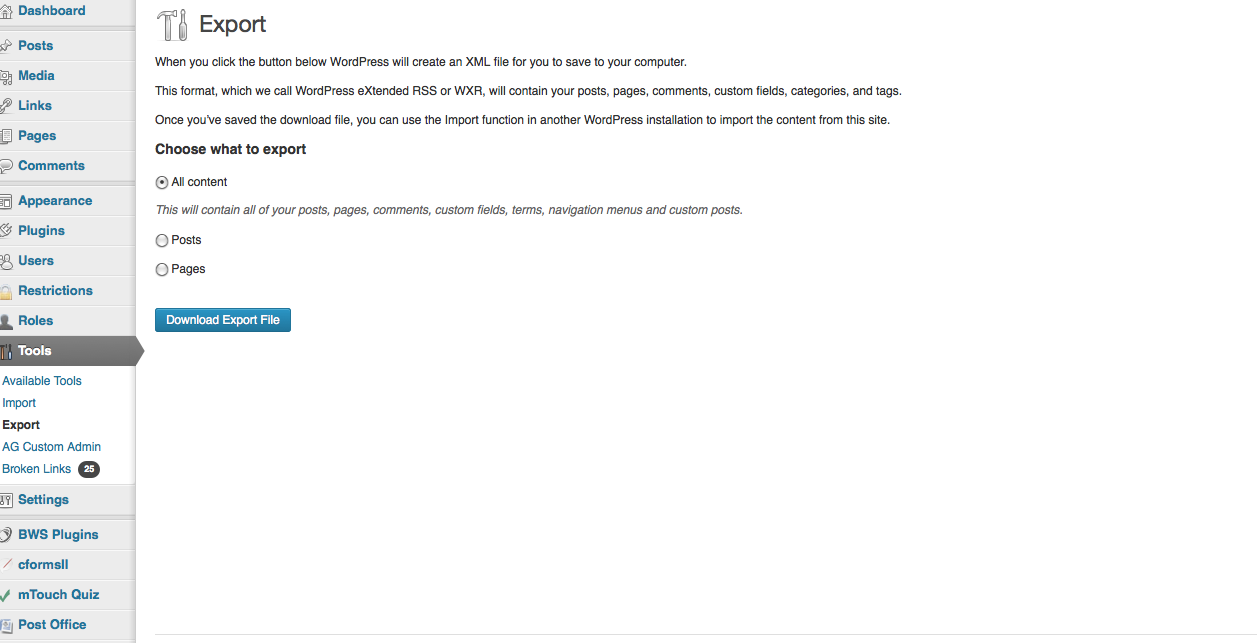 [/two_third]
[one_third_last][/one_third_last]
- This is way more tricky. Rather than re-inventing the wheel here, this seems to be the best tutorial I could find at the moment. Here is a video tutorial